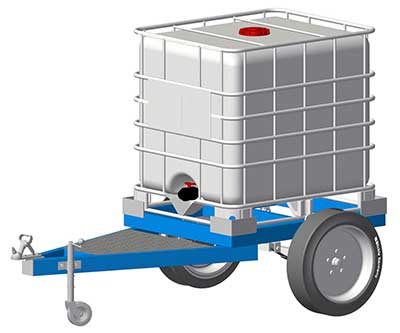
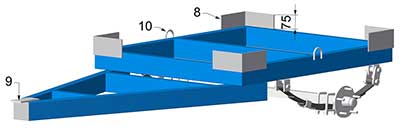
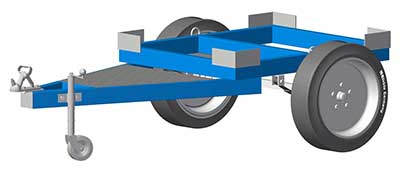
An IBC (Intermediate bulk container), also known as water pod, IBC tote, IBC plastic water tank or pallet tank, is a useful item to have around the farm. When mounted on a trailer, it can be used for fire fighting with a suitable pump and hose fitted, carting water for livestock or for weed spraying.
Free 1000 Litre IBC Tote Pod Trailer Plans
| Materials Required | |||
|---|---|---|---|
| Item Number | Material | Length | Quantity |
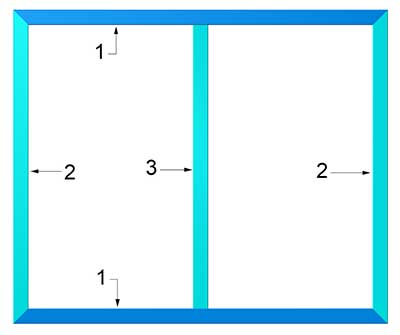
| 1 | 100x50x3.0 RHS | 1230mm | 2 |
| 2 | 100x50x3.0 RHS | 1030mm | 2 |
| 3 | 100x50x3.0 RHS | 930mm | 1 |
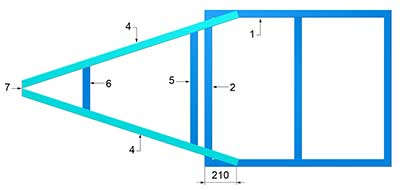
| 4 | 100x50x3.0 RHS | 1500mm | 2 |
| 5 | 100x50x3.0 RHS | 750mm | 1 |
| 6 | 100x50x3.0 RHS | 290mm | 1 |
| 7 | 100x6 flat bar | 105mm | 1 |
| 8 | 100x6 flat bar | 200mm | 8 |
| 9 | 75x8 flat bar | 150mm | 1 |
| 10 | 12mm round bar | 150mm | 2 |
1. Begin by cutting all of the steel as indicated in the cutting list. Label each with the item number on it using a marking pen and set aside. Take note of the mitre cuts for the RHS to ensure that they are cut the correct way.
2. Tack weld the main frame together as shown in diagram 1. Check that the frame is square and fully weld.
3. Tack weld items 4, 5 and 6 as shown in diagram 2. Check that the drawbar is centred with the main frame and fully weld. Weld item 7 over the ends of items 4. When welding items 4 to items 2, do not weld across the top side as this creates a weak point in the drawbar.
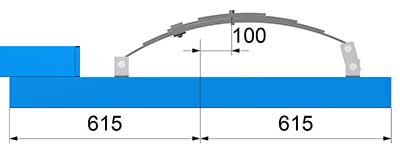
4. Weld the spring hangers onto items 1 of the main frame. When welding the spring hangers in place, only weld the sides of the hanger to items 1 as welding across the face also creates a weak point. Refer to diagram 3. The dimensions shown in diagram 3 are generalised as this will depend on the springs that you intend to use.
5. Turn the trailer frame over and install items 8. Refer to diagram 4.
6. Cut and drill item 8 flat bar to suit your coupling. Weld in place.
7. The tie down points (items 10), can either 12mm round bar bent into a “U” shape or you may choose to purchase suitable U bolts.
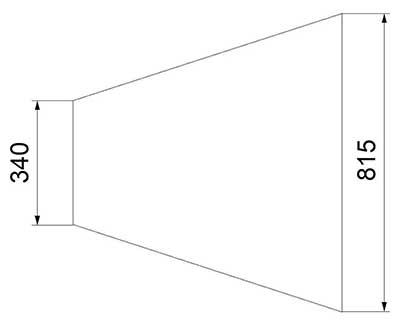
8. Cut the floorplate (checker plate) to size and weld in place. This is to mount any equipment such as a pump or hose reel. Refer to diagram 4 for dimensions.
9. Clean up any welds using a flap disc or grinding disc and paint as required.
10. Install axles and hubs.
11. Mount wheels to hubs and fit jockey wheel and coupling. upper plate. Have another person hold the second post assembly in the appropriate position and secure the other ands of the angle using bolts and nuts. Secure the bolts and nuts tightly.
